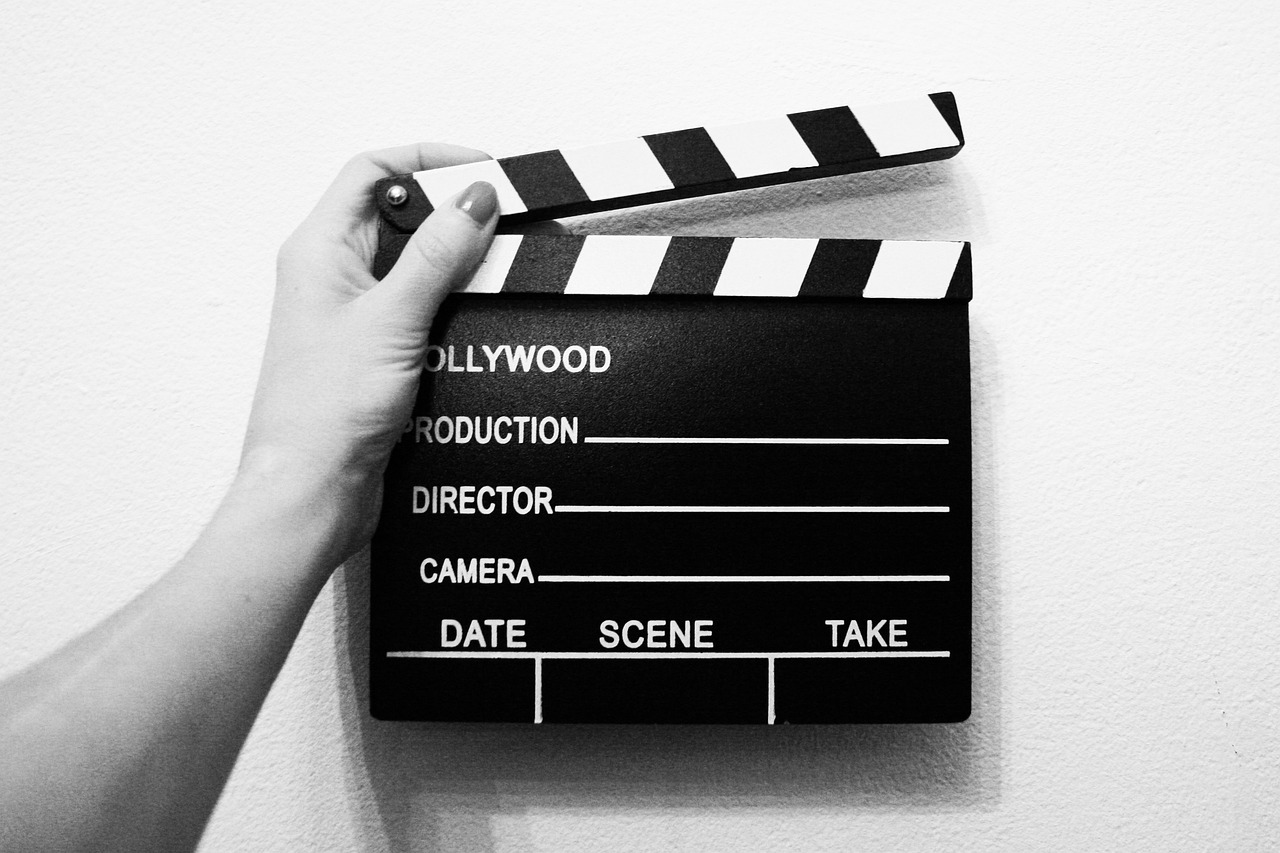
Chapter 14 Directing Your Film
A director is a creative force behind the film, similar to a god, or a leader who takes all the credit or the blame. As a director, you should have a passion for the story. You will be involved for a long time with your film.
This chapter explains the secrets behind how a director produces a film, what makes a great director, and how he/she translates a script onto the screen. You will learn about the cinematic language of directors, from how they make decisions on the shoot to symbolism and pacing. It is also important to know when and how to move your camera since it is a motion picture. Filmmaking is an extremely laborious job. Be prepared for a long and exhausting marathon.
14.1 Focusing on Directing your Film
Directing a film is a challenging and rewarding experience. It requires creativity, leadership skills, and the ability to communicate effectively with your cast and crew. As a director, your primary role is to bring your vision to life on the screen. This involves making decisions about every aspect of the film, from casting to cinematography to editing. In this article, we will explore some of the key traits required to be a successful director and offer tips on how to train yourself to become a great director.
Directing Traits
One of the most important traits for a director is the ability to communicate effectively. You must be able to clearly convey your vision to your cast and crew, as well as listen to their ideas and feedback. Strong communication skills will help you build a cohesive team and ensure that everyone is working towards the same goal.
Another important trait is leadership. As the director, you are in charge of the production and are responsible for making final decisions. You must be confident in your abilities and willing to take charge when necessary. However, you also need to be able to delegate tasks and trust your team to carry out their responsibilities.
Creativity is also essential for a successful director. You must be able to envision the final product and work with your team to bring that vision to life. This involves making decisions about everything from costumes to camera angles to lighting.
Training Yourself as a Director
Becoming a great director takes time and effort. Here are some tips to help you train yourself to become a better director:
Study Film: Watch films from a variety of genres and time periods. Pay attention to the techniques used by the director, such as camera angles, lighting, and editing.
Take Classes: Consider taking classes in film directing, screenwriting, or other related fields. This will help you gain a deeper understanding of the art of filmmaking and learn from experienced professionals.
Practice: The best way to become a better director is to direct. Start small by making short films or music videos. This will allow you to experiment with different techniques and develop your skills.
Collaborate: Work with other filmmakers and industry professionals. This will help you build your network and learn from others’ experiences. You may also find opportunities to work on larger projects or get your work seen by a wider audience.
Read and Write: Read books and articles about filmmaking and screenwriting. This will give you a better understanding of the craft and help you develop your own style. Write your own screenplays and practice pitching your ideas to others.
In conclusion, directing a film requires a combination of creativity, leadership skills, and effective communication. By studying film, taking classes, practicing, collaborating, and reading and writing, you can train yourself to become a better director. Remember that becoming a great director takes time and effort, so be patient and persistent in pursuing your goals.
14.2 Translating Script to Screen
The process of translating a script to the screen as a film director can be a daunting task. The screenplay serves as the foundation for the entire film, and it is up to the director to interpret and bring the story to life. In this article, we will explore two crucial aspects of translating the script to screen: understanding the screenplay and rewriting or adjusting the script.
Understanding the Screenplay
Before any filming begins, the director must have a clear understanding of the screenplay. This includes analyzing the characters, plot, setting, and themes. By understanding these elements, the director can effectively translate the story to the screen.
One of the most important aspects of the screenplay is the characters. The director must delve into each character’s motivations, relationships, and emotions. By understanding each character’s unique traits, the director can help the actors bring their performances to life. Additionally, the director must also pay close attention to the story’s plot and pacing. This includes analyzing the story’s structure, identifying key plot points, and ensuring that the film maintains a proper pace.
Another crucial aspect of understanding the screenplay is the setting. The setting serves as the backdrop for the story, and it is up to the director to bring it to life. This includes identifying the necessary props, costumes, and set pieces to create a believable world. The director must also consider the film’s budget and limitations when designing the setting.
Lastly, the director must analyze the screenplay’s themes. This includes identifying the underlying messages and exploring the story’s deeper meaning. By understanding the themes, the director can help bring a more profound emotional resonance to the film.
Rewriting or Adjusting the Script
Once the director has a clear understanding of the screenplay, they may need to adjust or rewrite the script. This is often done to improve the story’s pacing, clarify character motivations, or enhance the overall emotional impact.
One common adjustment directors make is to cut or rearrange scenes to improve the pacing. This involves identifying scenes that may slow down the story’s momentum or adding scenes to help build tension. The director may also adjust dialogue to better reflect the characters’ motivations or improve the story’s overall flow.
Another common adjustment is to rework the script’s structure. This may involve rearranging scenes or shifting the focus of the story to better emphasize a particular character or theme. The director may also choose to add or remove subplots to better serve the story’s overarching themes.
Lastly, the director may need to adjust the script to better fit within budgetary constraints. This may involve removing certain locations or characters or reworking scenes to make them more feasible to film.
In conclusion, translating a script to the screen as a film director requires a thorough understanding of the screenplay and the ability to adjust or rewrite the script as necessary. By analyzing the characters, plot, setting, and themes, the director can bring the story to life in a way that resonates with audiences. Additionally, adjusting the script as needed can help improve the film’s pacing, emotional impact, and budgetary feasibility. With these skills, a director can bring their creative vision to life on the big screen.
Visualizing your Screenplay
As a film director, your primary job is to translate a screenplay into a visual medium that resonates with audiences. However, this process is not always straightforward, and it can be challenging to visualize the written word as a fully realized film. In this article, we will explore how to visualize your screenplay as a film director.
Understand the story
The first step in visualizing your screenplay is to have a clear understanding of the story. This includes analyzing the plot, characters, themes, and tone. By understanding these elements, you can more easily translate them into a visual medium.
Begin by reading the screenplay several times, taking note of each character’s motivations and relationships. As you read, consider how you might visually represent each character’s emotional journey. Look for key moments in the story that are essential to the plot or character development and think about how you might capture those moments on film.
Consider the Setting
The setting of a film plays a crucial role in visual storytelling. As a director, you need to consider how to bring the setting to life visually. Consider how each location and the set piece can contribute to the overall tone and mood of the film. Think about how you might use camera angles, lighting, and framing to capture the essence of each location.
Additionally, consider how the setting might affect the characters and their emotional journeys. For example, a character’s home might be cozy and warm, representing a place of comfort and safety. Conversely, a hospital might be sterile and cold, representing a place of fear and uncertainty.
Visualize the Scenes
Once you understand the story and setting, it’s time to start visualizing each scene. This involves thinking about camera angles, lighting, framing, and pacing. Consider how you might capture the emotion of each moment visually. Think about the use of color, composition, and sound design to enhance the impact of each scene.
Consider the pacing of each scene and how it fits into the overall structure of the film. Think about the use of editing to create tension, suspense, or drama. Additionally, consider how you might use transitions to move from one scene to another smoothly.
Collaborate with your Team
As a film director, you are part of a larger team that includes writers, producers, cinematographers, and designers. Collaboration is key to bringing your vision to life. Be sure to communicate your ideas clearly to your team and be open to feedback and suggestions.
Collaboration also means being open to changes and adjustments. Sometimes, what works on the page doesn’t translate well to the screen. Be willing to make adjustments and rework scenes as necessary to ensure that the final product is the best it can be.
In conclusion, visualizing your screenplay as a film director requires a clear understanding of the story, setting, and characters. By thinking about camera angles, lighting, and framing, you can bring each scene to life visually. Collaboration with your team is also crucial to creating a film that resonates with audiences. By working together, you can transform the written word into a fully realized visual story.
14.3 Mapping Out Your Plans for the Camera
As a film director, your primary goal is to create a visual story that captivates your audience. To achieve this, you need to plan out your camera shots carefully. In this article, we will explore how to map out your plans for the camera as a film director.
Designing Storyboards
One of the most effective tools for planning camera shots is storyboarding. A storyboard is a visual representation of your film, shot by shot. It is essentially a comic book version of your screenplay that shows each camera angle, character placement, and movement. Storyboarding is a critical step in the pre-production process because it allows you to see your film come to life before you even start filming.
To create a storyboard, start by breaking down your screenplay into individual shots. Sketch out each shot on a storyboard template, and include notes on camera placement, movement, and any important details. Consider the mood and tone of each scene, and how you can capture it visually. You can use simple sketches, stick figures, or even photos to create your storyboards.
Collaborate with your Team
As a film director, you are part of a larger team that includes writers, producers, cinematographers, and designers. Collaboration is essential when mapping out your camera plans. Share your storyboards and shot lists with your team, and be open to feedback and suggestions.
Collaboration also means being flexible and adaptable. While planning is crucial, things may change on set. Be prepared to adjust your shot list or storyboard as necessary to accommodate changes in the script, location, or schedule.
Creating a Shot List (a.k.a. Dance Card)
Another crucial tool for planning camera shots is a shot list. A shot list is a detailed breakdown of each shot you plan to film, including the camera angle, lens, movement, and duration. This is essentially a checklist that you can use on set to ensure that you capture everything you need for each shot.
To create a shot list, start by reviewing your storyboard and breaking down each shot into its individual elements. List out each camera angle, lens, and movement you plan to use for each shot. Include any notes on lighting, sound, or other important details. Organize your shot list by scene and shot number so that it is easy to follow on set.
Sketching a Floor Plan
As a filmmaker, creating a floor plan with an overhead view of where the camera and actors will be placed for each shot within a scene is an essential part of the pre-production process. This floor plan will help you visualize the space and plan out the camera movements, blocking, and lighting for each shot. The following steps are involved in sketching the floor plan:
Step 1: Understand the Script
Before you start sketching your floor plan, you need to understand the script thoroughly. Study each scene and note the key details, such as the location, the number of actors, and the tone of the scene. This information will help you plan the camera movements, blocking, and lighting for each shot.
Step 2: Choose the Right Tools
To create a floor plan with an overhead view, you will need some basic tools, such as a pencil, ruler, and graph paper. You can also use software like SketchUp or RoomSketcher to create a digital floor plan. Choose the tool that works best for you.
Step 3: Create the Floor Plan
Start by drawing a basic layout of the room or location where the scene takes place. Use your ruler to create straight lines and ensure that the dimensions are accurate. Once you have the basic layout, add details such as furniture, doors, and windows.
Step 4: Add Camera and Actor Positions
Next, add the camera and actor positions to the floor plan. Use symbols to represent each actor and the camera. For example, you could use a circle to represent the camera, and triangles to represent the actors. Place the symbols on the floor plan to indicate where the actors and camera will be positioned for each shot.
Step 5: Plan Camera Movements and Lighting
Using your floor plan, plan out the camera movements for each shot. Think about the type of shot you want to achieve, such as a close-up or a wide shot, and plan the camera movements accordingly. Also, consider the lighting for each shot and plan out the placement of lights on your floor plan.
Step 6: Review and Revise
Once you have created your floor plan, review it and revise it as necessary. Make sure that the camera movements, blocking, and lighting make sense and that you can achieve the shots you want within the space available.
In Conclusion
Sketching a floor plan is an essential part of the pre-production process. It helps you visualize the space and plan out the camera movements, and lighting for each shot. By following these steps and using the right tools, you can create an accurate and detailed floor plan that will help you bring your vision to life on screen.
14.4 Keeping Track of Continuity with Your Script Supervisor
As a film director, keeping track of continuity is crucial for ensuring a seamless viewing experience for your audience. Continuity refers to the consistency of visual and narrative elements within a scene or film, including props, costumes, and character movements. To achieve continuity, many directors work closely with a script supervisor. In this article, we will explore why you should keep track of continuity with your script supervisor and how to do it effectively.
Why Work with a Script Supervisor?
A script supervisor is a key member of the film production team who works closely with the director, the cinematographer, and the editor to ensure consistency in the film’s visual and narrative elements. They keep track of the script, take notes on every shot, and monitor continuity issues throughout the filming process. They also ensure that every shot is consistent with the script, the characters, and the overall style of the film.
Benefits of Working with a Script Supervisor
Working with a script supervisor has several benefits for a film director. First, it allows you to focus on the creative aspects of the film, such as directing the actors and working with the cinematographer, without worrying about continuity issues. Second, it helps to ensure that the final product is visually consistent and engaging for the audience. Finally, it saves time and money by reducing the need for reshoots or post-production fixes.
How to Work with a Script Supervisor
To work effectively with a script supervisor, you should establish clear communication and expectations from the start. Before filming begins, meet with your script supervisor to discuss the script and any specific continuity issues that you want them to look out for. Ensure that they understand your vision for the film and your expectations for each scene.
During filming, your script supervisor will take detailed notes on every shot, including the position of the camera, the actions of the actors, and the placement of props and costumes. They will also take note of any issues that may affect continuity, such as changes in lighting or weather. You should meet with your script supervisor regularly to review their notes and discuss any concerns or changes that need to be made.
After filming is complete, your script supervisor will work closely with the editor to ensure that every shot is consistent with the script and the final product. They will also ensure that any continuity issues are addressed before the film is released.
Using Coverage and Cutaways
As a filmmaker, it’s important to capture your scenes from multiple angles to ensure that the continuity of your shots is logical. This is where coverage comes in. Coverage is the process of shooting the same action from different angles to give you options during the editing process. Another technique to enhance your film’s visual storytelling is by using cutaways. In this article, we’ll explore the benefits of inserting coverage and cutaways in your film.
Benefits of Using Coverage
Using coverage provides the editor with a variety of options to choose from when piecing together the final cut of the film. This ensures that the story flows logically and that the audience doesn’t get distracted by continuity issues. By shooting a scene from multiple angles, you can emphasize certain moments, add depth to a scene, and create a more dynamic visual experience for the audience.
Benefits of Using Cutaways
Cutaways are a powerful tool for enhancing a film’s storytelling. They can be used to show reactions to events in the scene or to give the audience a glimpse of something happening outside of the main action. Cutaways can be used to build tension or to create humor in a scene. They can also be used to give the audience a moment to breathe and process what is happening in the story.
How to Use Coverage and Cutaways
When shooting a scene, it’s important to plan out your coverage in advance. This will ensure that you capture all the necessary shots and that you have a variety of options to choose from during the editing process. You should also consider the pacing and tone of the scene and use coverage to enhance those elements.
When using cutaways, it’s important to be strategic about when and where you use them. Cutaways should be used sparingly and only when they add value to the scene. When choosing a cutaway, think about what the audience needs to see and how it will enhance their understanding of the story.
Inserts
An insert shot is akin to a cutaway shot in that it typically takes place in the same location as the main action or dialogue, but is often filmed separately or after the actors have left the set. It is usually a close-up shot of an object or a person holding an object, such as a watch, a letter, or a remote control. For instance, in Back to the Future, an insert shot of Doc operating the time-machine DeLorean with a remote control was used. Insert shots of someone turning pages in a book or a close-up shot of a watch can be filmed with a different actor if the main actor is not available. However, it is essential to ensure that the hands and any visible jewelry are similar in appearance to the main actor’s.
Tips for Effective Use of Coverage and Cutaways
To use coverage and cutaways effectively, you should consider the following tips:
Plan ahead: Before shooting, plan out your coverage and cutaway shots in advance.
Consider pacing and tone: Use coverage and cutaways to enhance the pacing and tone of your scenes.
Be strategic: Use cutaways sparingly and only when they add value to the scene.
Think about the audience: Consider what the audience needs to see and how cutaways can enhance their understanding of the story.
Use coverage to emphasize moments: Use coverage to emphasize important moments in the scene and add depth to the story.
Using coverage and cutaways in your film can enhance the visual storytelling and ensure that the audience stays engaged throughout the story. By planning ahead and being strategic in your use of these techniques, you can create a more dynamic and engaging film that resonates with your audience. So the next time you’re on set, remember to capture your scenes from multiple angles and consider using cutaways to enhance your storytelling.
In Conclusion
Working with a script supervisor is an essential part of maintaining continuity in film production. By keeping track of visual and narrative elements throughout the filming process, script supervisors help to ensure that the final product is engaging and consistent for the audience. As a film director, it is important to work closely with your script supervisor to establish clear expectations and maintain open communication throughout the production process. By doing so, you can ensure that your vision is realized on screen and that your audience has a seamless viewing experience.
Maintaining Screen Direction
Maintaining screen direction is a crucial aspect to consider while filming. If a car is moving from right to left in a particular shot, it should continue in the same direction in subsequent shots until it reaches its destination. However, if the camera switches sides and captures the car from the left side, it will appear to be heading in the opposite direction, causing confusion for the audience. This is where the concept of the action axis or 180-degree rule comes into play. By adhering to this rule, filmmakers ensure consistency in the direction of their actors and movement, thus avoiding confusion. Just like in a football game, the cameras never cross the line, or else it would appear as if the home team is running in the wrong direction.
Maintaining consistent screen direction also applies to the actors’ eye-line. When an actor speaks to someone on their left, the other actor is expected to look towards their right. Filmmakers create an imaginary line and keep all elements on one side of the line or the other, to maintain consistency. If the camera captures both actors looking towards their left, it will appear as though they are looking at something off-screen and not at each other. It is crucial to avoid crossing the line of action to prevent the on-screen direction from flipping, causing disorientation for the audience.
Amateur filmmakers often make the mistake of crossing the line of action, causing abrupt cuts and disorientation for the audience. However, the camera can cross the line while in motion, showing a change of direction on-screen, thus alerting the audience that the camera has stepped over the line. By paying close attention to screen direction and adhering to the 180-degree rule, you can maintain consistency and create a smooth and seamless visual narrative.
14.5 Taking the Best Shot
The camera captures everything, without blinking an eye. To transition from one shot to another, you must use cuts that vary in size and angle to avoid jump cuts. The composition, size, and angle of your shots play a vital role in conveying your story. For instance, a close-up may be appropriate for an intimate conversation between two actors, while a wide-establishing shot may show the actors surrounded by a barren wasteland. Joseph V. Mascelli’s book, The Five C’s of Cinematography, is an excellent resource for studying shot composition.
As a director, understanding the basics of cameras and lenses is advantageous. If you want your production to look professional, you should hire a skilled cinematographer who is knowledgeable about shooting digital and/or film, lenses, and exposures to get the best possible images. However, it’s always best to have a sense of what the camera can do to convey your story visually.
Framing and shot sizes may have slightly different meanings for each cinematographer and director. However, this article provides a list of traditional shots that are similar enough to warrant an explanation in the following sections:
- Wide shot (which can also function as an establishing shot)
- Medium shot
- Two shot
- Close-up shot
Establishing a Wide Shot For Your Scene
As a film director, one of the most important decisions you can make is how to visually establish your scene. One effective way to do this is through the use of a wide shot. A wide shot, also known as an establishing shot, sets the scene and provides context for the audience. It shows the location of the scene and can provide information about the time of day, the weather, and the overall mood of the scene.
When using a wide shot, it’s important to consider the composition of the shot. The goal is to create a visually interesting shot that captures the audience’s attention and draws them into the scene. Here are some tips for establishing an effective wide shot:
Choose the Right Location: The location you choose for your wide shot is crucial. It should be a location that is visually interesting and provides context for the scene. It should also be a location that can be easily recognized by the audience.
Consider the Time of Day: The time of day can have a big impact on the mood of your scene. A wide shot of a city skyline at night, for example, can create a sense of mystery and intrigue, while a wide shot of a beach at sunset can create a romantic mood.
Use Foreground and Background Elements: To create a visually interesting shot, it’s important to use foreground and background elements. This could include trees or buildings in the foreground or clouds or mountains in the background.
Use Movement: Movement can add a dynamic element to your wide shot. This could include the movement of people, vehicles, or even the camera itself.
Use the Right Equipment: To capture an effective wide shot, it’s important to use the right equipment. This could include a drone, a crane, or even a simple tripod.
One of the key benefits of using a wide shot is that it can establish a sense of place and create a visual connection between the audience and the scene. It can also help to create a sense of anticipation, as the audience awaits the arrival of the main characters.
When establishing a wide shot for your scene, it’s important to choose the right location, consider the time of day, use foreground and background elements, incorporate movement, and use the right equipment. By following these tips, you can create an effective wide shot that sets the scene and draws the audience into the story.
Establishing a Medium Shot For Your Scene
choosing the right shot size is crucial in establishing the mood and tone of your scene. A medium shot is a versatile shot that is neither too close nor too far away from the subject. It’s a great shot to use for dialogue scenes or when you want to show the subject’s body language and facial expressions.
Here are some tips on how to establish a medium shot for your scene:
Determine the purpose of the shot: Before choosing a medium shot, consider the purpose of the shot in the scene. Are you trying to capture a conversation between two characters? Or do you want to show a character’s reaction to something? Once you know the purpose, you can determine the placement and framing of the shot.
Choose the right lens: The lens you choose will have an impact on the shot’s composition and overall look. A wider lens will create a deeper depth of field and allow you to capture more of the surrounding environment, while a longer lens will compress the image and focus more on the subject.
Position your subject: When setting up your shot, ensure that your subject is in the right position within the frame. Consider the rule of thirds and place your subject on one of the intersecting lines to create a more visually appealing shot.
Frame the shot: When framing a medium shot, it’s important to consider the distance between the subject and the camera. Ensure that the subject is not too close or too far away and that they are comfortably within the frame.
Consider camera movement: Adding camera movement can add depth and dimension to your shot. Consider using a dolly or a handheld camera to create movement within the frame.
Use lighting to enhance the shot: Lighting can make a significant impact on the mood and tone of your shot. Consider the time of day and the color temperature of your lights to create the desired effect.
A medium shot is a versatile shot that can be used for a variety of purposes in your scene. By following these tips, you can establish a well-composed and visually appealing medium shot that enhances your story.
Establishing a Two-Shot For Your Scene
As a filmmaker, it’s essential to establish a variety of shots to convey the message of your scene effectively. One of those shots is the two-shot, which can be used in several ways to capture the dialogue between two actors.
A two-shot is a shot in which two actors are placed in the same frame, and it’s a perfect way to capture a dialogue scene between two characters. It can either be in a form of a medium shot or an over-the-shoulder shot.
The first type of two-shot is the medium shot, where two actors are standing or sitting next to each other in the frame. This type of shot is used to show the characters’ interaction and their physical proximity to each other. A medium two-shot is often used in casual or informal situations, such as a conversation between friends or family.
The second type of two-shot is the over-the-shoulder shot, where one actor’s back or profile is closer to the camera than the other actor facing the camera. This type of shot is used to capture a more intimate conversation between two characters, where the focus is on their dialogue and facial expressions. An over-the-shoulder two-shot is often used in more dramatic or emotional scenes.
Using a two-shot can save time and money during filming as it eliminates the need for additional close-ups and cutaways. By having both actors in the same frame, you can capture their dialogue and reactions in one take, which can be a significant advantage in a fast-paced production.
When establishing a two-shot, it’s crucial to consider the placement of the actors within the frame. The positioning should be natural and reflect the characters’ relationship with each other. If the characters are close, they should be placed closer together in the frame. If there is tension between them, they can be placed further apart.
The two-shot is a powerful tool for filmmakers and can be used to convey a variety of emotions and messages. It’s important to experiment with different types of two-shots to find the best way to capture your scene and tell your story.
In conclusion, establishing a two-shot in your scene can be an effective way to capture a dialogue between two characters. By using a two-shot, you can save time and money while still conveying the emotions and messages of your scene. Remember to consider the placement of the actors within the frame and experiment with different types of two-shots to find the best way to tell your story.
Establishing a Close-Up Shot For Your Scene
Close-up shots are an essential tool for filmmakers to capture the subtlest of emotions and expressions on their actors’ faces. This type of shot is used to convey the emotions of the character and is often used to emphasize a particular aspect of the scene. It’s a powerful tool in the filmmaker’s arsenal, and when used correctly, it can make the difference between a good and a great film.
A close-up shot is used when the director wants to focus the audience’s attention on a particular aspect of the scene. It’s often used to capture the actor’s facial expression, and sometimes, it’s used to capture an object or a detail that’s essential to the story. Close-up shots can also be used to create tension or suspense in the scene, by allowing the audience to see a character’s reaction or emotion up close.
When setting up a close-up shot, it’s essential to consider the actor’s position in the scene. The director needs to ensure that the actor’s face is fully visible and that the shot is framed correctly. If the actor is not positioned correctly, the shot could end up being too tight, resulting in a cropped or distorted image. On the other hand, if the shot is too wide, the audience may not be able to see the expression or detail that the director wants to convey.
To establish a close-up shot, the camera needs to be positioned close to the subject, and the focus needs to be adjusted accordingly. It’s important to ensure that the focus is sharp, and the subject is in focus, even if they move slightly within the frame. The lighting also needs to be adjusted to ensure that the subject is correctly lit and that their features are visible.
Close-up shots are often used in dialogue scenes, where the director wants to capture the subtle nuances of the conversation. In these scenes, the close-up shot can be used to switch between the actors’ faces, allowing the audience to see their reactions and emotions as they speak. When shooting a dialogue scene, it’s essential to shoot a variety of shots, including wide shots, medium shots, and close-ups, to create a visual rhythm and keep the audience engaged.
In conclusion, a close-up shot is an essential tool for filmmakers, allowing them to capture the smallest details of a scene and convey the emotions of their characters effectively. When setting up a close-up shot, it’s essential to consider the actor’s position, framing, focus, and lighting. By doing so, the director can create a powerful shot that enhances the story and engages the audience.
14.6 Deciding When to Move the Camera and Why
As a filmmaker, one of the most important decisions you will make is when and how to move the camera. Camera movements can add depth, emotion, and energy to your scenes. However, it’s important to understand that not every scene needs a camera movement, and the type of movement you choose should always serve a purpose in telling your story. In this article, we’ll discuss some of the common camera moves and when to use them.
Revealing Something
One of the most common reasons to move the camera is to reveal something important to the story. This could be a character, an object, or a location. For example, you might use a camera movement to reveal a hidden door, a secret passage, or a character’s face for the first time. This type of camera movement can create suspense and intrigue, as the audience is eager to see what is being revealed.
Emphasizing a Character’s Reaction
Another reason to move the camera is to emphasize a character’s reaction to something that is happening in the scene. This could be a close-up of a character’s face as they react to a shocking event or a panning shot that follows a character’s gaze as they look at something off-screen. This type of camera movement can help the audience connect with the character on a deeper level, as they feel the same emotions that the character is feeling.
Underlining a Dramatic Effect
Camera movements can also be used to underline a dramatic effect in the scene. This could be a sweeping crane shot that captures the scope of a battle or a tracking shot that follows a character as they walk down a long hallway. This type of camera movement can create a sense of grandeur and scale, making the scene feel epic and memorable.
Creating a Sense of Chaos or Excitement
Sometimes, a scene calls for a camera movement that creates a sense of chaos or excitement. This could be a handheld camera that follows a character as they run through a crowded street or a whip pan that captures the frenetic energy of a dance party. This type of camera movement can make the audience feel like they are right in the middle of the action, creating a visceral and immersive experience.
Following a Character
Finally, camera movements can be used to follow a character as they move through the scene. This could be a tracking shot that follows a character as they walk down a street or a steadicam shot that moves with a character as they run through a forest. This type of camera movement can create a sense of momentum and movement, helping to propel the story forward.
Camera movements can add a lot of value to your scenes, but they should always serve a purpose in telling your story. Whether you are revealing something important, emphasizing a character’s reaction, underlining a dramatic effect, creating a sense of chaos or excitement, or following a character, the camera movement should enhance the emotional impact of the scene. When you use camera movements effectively, you can create memorable and engaging cinematic experiences that will stay with your audience long after the film is over.
14.6.1 Using Dollies
To achieve fluid camera movement, a dolly is often necessary. A professional dolly with a hydraulic stand can be rented for a smooth and controlled motion, or a DIY option can be made by attaching a flat board with rugged wheels to a tripod, such as the lightweight yet sturdy Manfrotto tripod with a fluid head for easy panning and tilting.
When filming on an uneven surface, dolly tracks are needed to ensure smooth movement. These can be rented with the dolly or created with boards or mats laid down on the ground. The Dyno Trek tracking slider is a lightweight and portable option that comes with interlocking tracks for easy travel and storage and is battery-rechargeable and controllable through the Dyno Trek app. While designed for light cameras like GoPros and smartphones, it has also been used successfully with DSLR cameras. The Dyno Trek slider system is priced at around $400.
For those on a budget, a wheelchair can be borrowed to achieve smooth movement. By sitting in the wheelchair with the camera and using a beanbag pillow for stability, a helper can push the chair for a controlled dolly shot.
In some cases, a creative solution can also be found. For example, when filming a scene of a boss talking to board members over a conference table, the camera was placed on an inexpensive skateboard and smoothly moved over the surface of the table toward the boss. This unconventional approach resulted in one of the smoothest shots in the movie.
14.6.2 Using a Camera Crane
A camera crane can add a dynamic and dramatic effect to your shots by allowing you to raise or lower the camera while shooting. One popular series of cranes is the CobraCrane by SteadyTracker, which ranges from 3 to 15 feet in length and can be attached to your own tripod. The CobraCrane features a cable-and-pulley system with roller bearings that allows for smooth tilting of the camera in all directions. You can find the CobraCrane on www.steadytracker.com, starting at around $300.
It’s important to be able to see the shot when using a crane to ensure you get the desired effect. Without proper monitoring, your footage could be unusable or not quite what you intended. When shooting digitally, you can run a video cable from the camera to a TV monitor or use Bluetooth or Wi-Fi to connect wirelessly, which is now possible with many digital cameras. For film cameras, a video assist unit is necessary, which can be found in Chapter 10 for more information.
For monitoring shots taken with a crane, it’s possible to use a smartphone or other mobile device. I use my iPhone to watch and playback crane footage wirelessly via Wi-Fi when shooting with my Panasonic Lumix GH5s. Additionally, a set of inexpensive free weights from a sporting goods store can be used to counterbalance the crane and keep the camera in the air, similar to a teeter-totter.
14.6.3 Using Camera Stabilizers
A camera stabilizing device can transform your camera into a smooth and fluid capturing machine. It acts as a shock absorber to minimize unwanted movements and vibrations. In the past, stabilizing camera systems used to cost up to $100,000, but now, with technological advancements, you can get them for under $400. These devices allow the camera operator to capture moving shots without the need for laying down dolly tracks. Instead, the operator walks with the camera, which floats on a stabilizing gimbal.
The Steadicam, made by the Tiffen Company (www.tiffen.com), is a popular brand used in Hollywood. However, you can also consider the FeiyuTech a2000 stabilizing gimbal, which can support digital cameras weighing up to five pounds and costs around $400 on Amazon. I personally use this device, and it keeps all my moving shots stable and smooth.
Manfrotto’s Fig Rig, which looks like a steering wheel and costs around $350, is another option. It allows you to attach small lights, a microphone, and a camera remote conveniently on the handle, making it easy to control the camera’s zoom and turn it on and off.
The Rollocam H2 is a new and innovative device that functions as a free-roaming slider for most DSLR or prosumer digital cameras. It is a smart robot built into a slider that can take your camera to almost any programmed destination. The device weighs only five ounces, fits in your pocket, and has a built-in intervalometer for time-lapse sequences. The Rollocam also features face recognition technology to follow you on three axes, and its free app controls its movement. It operates similarly to a slider or dolly but without the need for tracks and costs around $300. You can find more information about this device at www.steadytracker.com.
14.6.4 Using Drones for Filmmaking
Drones have revolutionized the world of filmmaking, offering a new perspective on capturing aerial shots and breathtaking landscapes. In recent years, drones have become more accessible to filmmakers of all levels, and have opened up new creative possibilities for filmmakers looking to capture unique shots that would have otherwise been impossible.
Before the invention of drones, capturing aerial shots was only possible with the use of helicopters or cranes, which are both very expensive and not always practical. Drones have made it possible to capture similar shots for a fraction of the cost and with much more flexibility. Drones come in various sizes and shapes, and filmmakers can choose the right drone for their specific needs, depending on their budget and the type of shot they want to capture.
One of the most significant advantages of using drones for filmmaking is the ability to capture shots from unique angles and perspectives. Filmmakers can capture shots that would have otherwise been impossible, such as tracking shots through dense forests, hovering over the tops of buildings, or tracking a subject through a winding path. This opens up new creative possibilities, and filmmakers can add an entirely new dimension to their work.
Another advantage of using drones for filmmaking is their mobility. Unlike cranes or helicopters, drones are portable and can be used in remote locations. This makes them perfect for filming in areas that are difficult to reach or where access is restricted. Drones can be used to capture shots in rugged terrains or to get close to wildlife without disturbing their habitat.
Drones also offer a level of convenience that traditional aerial filming methods cannot match. Filmmakers can operate drones from a remote location, controlling the drone and camera movements with a remote control or a mobile app. This makes it easier to capture shots that require precise movements and timing and allows filmmakers to experiment with different angles and movements until they get the best shot.
14.7 Shooting Enough Coverage
When it comes to shooting a film, one of the most important things to keep in mind is the need for enough coverage. Coverage refers to the different takes and angles that you capture of a scene, and it is crucial for giving your editor the flexibility to craft a compelling story. In this article, we will discuss why shooting enough coverage is essential and provide some tips on how to do it effectively.
14.7.1 Why Shooting Enough Coverage is Essential
Shooting enough coverage is important for several reasons. Firstly, it gives the editor options. The more angles and takes you have, the more choices the editor will have when piecing together the scene. This flexibility allows them to create a visually interesting and engaging sequence that keeps the audience’s attention.
Secondly, it can make the actors’ performances better. Actors often need multiple takes to get into character and deliver their lines convincingly. Shooting multiple angles and takes gives them the chance to explore their characters’ emotions and motivations in different ways, leading to more nuanced and complex performances.
Finally, shooting enough coverage can also save time and money in post-production. If you only have a few angles and takes to work with, the editor may have to spend more time and effort trying to make the scene work. In contrast, if you have plenty of coverage, the editor can quickly find the best takes and angles to create the scene, resulting in a smoother post-production process.
14.7.2 Tips for Shooting Enough Coverage
Here are some tips for shooting enough coverage to give your editor the flexibility they need:
Plan ahead: Before you start shooting, plan out each scene in detail. Think about the shots you will need and how they will fit together. This planning will help you ensure that you capture all the coverage you need.
Shoot multiple angles: Whenever possible, shoot the same scene from different angles. This will give the editor a variety of shots to choose from, making the scene more visually interesting.
Shoot multiple takes: It’s a good idea to shoot at least three takes of each shot, but some directors shoot ten or more. This gives the actors a chance to explore their performances, and it gives the editor more choices to work with.
Create movement: If you don’t have time to shoot multiple angles, create movement in the shot. For example, have the camera follow the actors as they walk and talk. This can make a single shot more interesting.
Use cutaways: Cutaways are shots of something other than the main action, such as a reaction shot or a close-up of an object. Cutaways can be used to break up a long shot or to cover a jump cut.
Some directors shoot a 3:1 or 10:1 ratio of takes to get one shot. The editor’s job is to find the best take or combine the best parts of multiple takes with cutaways. This technique is discussed further in Chapter 15. When you start editing the footage, the movie begins to take shape, and the story starts to make sense.
In conclusion, shooting enough coverage is essential for creating a compelling film. It gives the editor the flexibility they need to craft a visually interesting and engaging story, and it can improve the actors’ performances. By planning ahead, shooting multiple angles and takes, creating movement in shots, and using cutaways, you can ensure that you capture all the coverage you need to make your film a success.